
Sitting at a workbench with a spool of wire and a bag of cotton is where the real fun starts for any vaper tired of the “plug and play” routine. This coil building guide is your starting point. Pre-made coils work for basic use. However, they often lack the punch and clarity you get when you build coils yourself.
Building your own coils means taking full control of your setup. You decide how your vapor should feel and taste. At first, it may look like a mess of tiny screws and tweezers. However, the first perfect hit makes the learning curve worth it. Once you find your rhythm with wraps and wicking, you may wonder why you ever chose generic, mass-produced options. Mastering the build gives you a level of performance that a factory-assembled part simply cannot match.
What Exactly is a Vape Coil building guide?
At its most basic level, a vape coil is the heating element of your device, acting as the bridge between your battery and your e-liquids. When you press the fire button, electricity flows through this resistance wire, causing it to heat up almost instantly. That heat is transferred to the wicking material—usually organic cotton—which is saturated with juice, turning it into the vapor you inhale. While it sounds simple, the way that wire is shaped and the material it is made from can drastically change your entire experience.
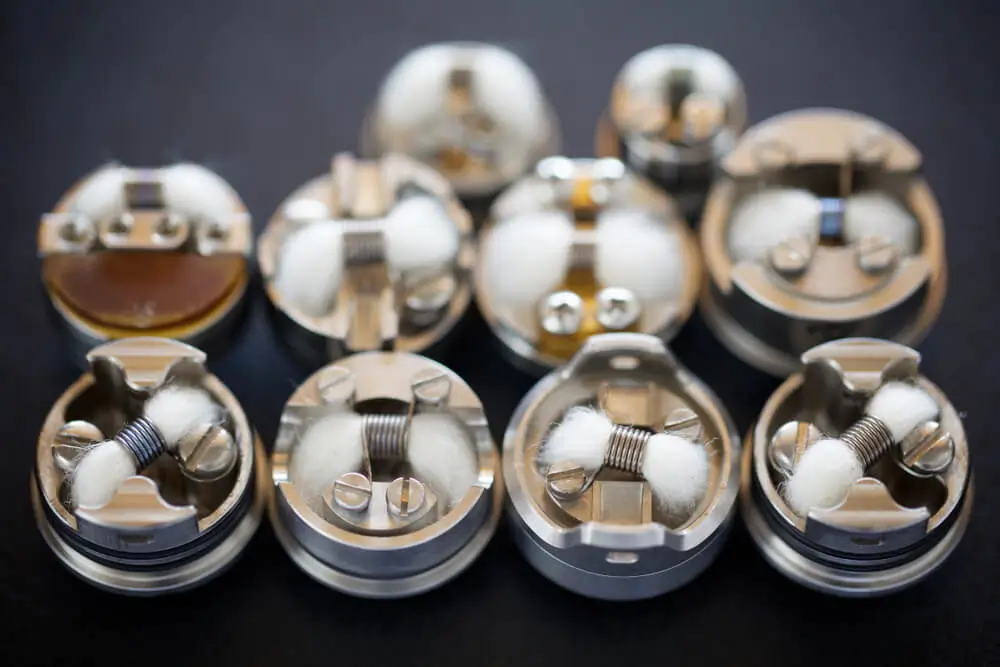
In a rebuildable atomizer (RDA or RTA), the coil isn’t encased in a metal housing like a standard replacement head. Instead, it sits exposed on a “build deck” where you can physically see the metal and the cotton. This open design is what allows for the massive customization that DIY enthusiasts crave. You can change the size, the number of wraps, and the positioning of the wire to fine-tune the airflow and the heat. It is this direct interaction with the heating process that gives rebuildables their reputation for superior performance and longevity.
Understanding how a coil works is the foundation of any solid coil building guide, especially for beginners looking to improve performance.
Why Spend Time Building Your Own and What are the Motivating Forces Behind This?
You might wonder why anyone would bother with wire and tweezers when they could just buy a pack of pre-made heads. The truth is fellow vapers, building offers several distinct advantages that you simply cannot get from a factory line, such as:
- Cost-Efficiency: Money is a major reason many vapers switch. A $10 spool of Kanthal wire and organic cotton can last a year or more. Factory coils, on the other hand, cost around $20 every two weeks. Not all of them perform well either. Over time, the savings become significant. You can spend that extra money on trying new e-liquids instead of replacing coils.
- Flavor Precision: Factory-made coils often use bulk cotton. This can create a “break-in” taste or a slight chemical note during the first half of a tank. When you build your own coils, you choose the exact grade of cotton. The open design also delivers a more direct and vivid flavor. You can experiment with different wire materials like Nichrome or Stainless Steel. Each one highlights different notes in your e-liquids.
- Customization: You are no longer limited to whatever resistance the manufacturer decided to mass-produce. If you want a 0.4-ohm hit but the factory only makes 0.2 or 0.8, you can simply add or remove a wrap to get exactly what you want. This allows you to fine-tune the heat and the vapor production to match your specific airflow settings and battery capacity. It puts you in the driver’s seat of your own experience.
- Consistency: We’ve all bought a pack of coils where half of them were duds that tasted burnt within ten puffs or leaked the moment they were primed. When you are the one tightening the screws and pulling the cotton, you have total quality control over the build. You can make sure there are no hot spots and that the wicking is perfect, which eliminates the frustration of leaking or dry hits that plague many mass-market vapes.
- The Hobby Aspect: Mastering a new skill creates a strong sense of pride. Many vapers find sitting at a workbench with a few tools relaxing and rewarding after a long day. This process turns a simple habit into a craft. The community around coil building also shares tips, coil designs, and advice to improve every setup.
- Longevity: Standard pod or coil heads are disposable. Once the cotton burns out, you must replace the entire unit. With a rebuildable setup, you remove the old cotton, dry-burn the coil, and install fresh wicking material. A single set of coils can last for a month or more with proper care. This reduces waste and creates a more reliable daily routin. This is exactly why following a structured coil building guide can help you unlock better flavor, consistency, and long-term savings.
So, What Tools are Needed Then to Get the Job Done?
Before you start twisting wire like a pro, organize your workbench with the right tools. Don’t rely on household scissors or random objects, they lead to frustration and poorly built coils that may not fire. Use a dedicated toolset to speed up the process and ensure clean cuts and secure connections. This improves both performance and safety.
You don’t need an expensive setup to begin. However, the right tools remove guesswork and help you avoid common issues like short circuits or damaged wire.
- Resistance Wire: This is the foundation of your build, and the material you choose dictates how fast your coils heat up and how they interact with your battery. Kanthal A1 is the classic choice for beginners because it is stiff enough to hold its shape while you’re wrapping it and has a very stable resistance. For those who want a faster “ramp-up” time, Nichrome 80 is a popular alternative that heats up almost instantly. If you use a device with temperature control, choose Stainless Steel 316L. It works in both power and TC modes and delivers a clean flavor that many vapers prefer.
- Flush Cutters: You cannot rely on standard wire cutters or nail clippers for this job. You need specialized flush cutters with a flat side to snip wire legs even with the posts of your atomizer. If any wire sticks out, it can touch the metal housing of the top cap. This creates a short circuit and prevents your mod from firing. A sharp set of cutters ensures a clean break every time without deforming the wire you just spent time wrapping.
- Ceramic Tweezers: These are one of the most important safety tools in your kit because ceramic is non-conductive and heat-resistant. This allows you to pinch or strum your coils to remove hot spots while pulsing the fire button. If you use metal tweezers, you will create a short the moment they touch the live coil. They are also perfect for tucking your cotton into the juice wells without snagging the delicate fibers.
- Coil Jig or Precision Mandrel: Consistency is everything in coil building, and a dedicated jig is the only way to ensure your internal diameter stays uniform. Most jigs come with interchangeable rods in sizes like 2.5mm, 3.0mm, or 3.5mm. By wrapping your wire tightly around these rods, you ensure that your cotton will fit perfectly every time. If your wraps are uneven or lopsided, the heat distribution will be off, leading to hot spots and a nasty burnt taste that ruins your e-juices.
- Precision Screwdrivers and Hex Keys: Most rebuildable decks use small grub screws or Phillips head screws to secure the wire. Using the wrong size screwdriver can strip the screw heads and damage your atomizer. A good tool kit includes multiple sizes to match different hardware. This helps you work with various setups as you try new vapes. Tighten the screws firmly so the wire does not move. This keeps the resistance stable and ensures consistent performance.
- Wicking Material: While it may look like regular cotton balls, vape cotton uses unbleached, untreated fibers with long, straight strands. This “vape-ready” organic cotton pulls liquid toward the coil through capillary action much more efficiently than standard cotton. High-quality wicking material ensures that you don’t get a “funky” or chemical taste during the first few hits. Allowing the true profile of your e-liquids to come through immediately.
- Ohm Reader or Regulated Mod: You should never fire a new build without checking its resistance first. A dedicated ohm reader gives you a stable platform and a precise digital resistance reading. If you do not have one, you can use a regulated mod with a high-quality chip. But you must watch the screen carefully. If the resistance jumps around or shows “Low Atomizer,” something is likely touching where it should not. Stop and troubleshoot the build before continuing. Every reliable vape coil building guide starts with having the right tools in place to ensure safety and precision.
The Process: A Step-by-Step Run-Down of Your First Build
This step-by-step process is the core of any effective coil building guide, helping you move from theory to real-world results.
Actually sitting down to wrap your first set of coils is where the theory finally meets the metal. This process requires patience and a steady hand. Once you find your rhythm, it becomes second nature and feels like a pre-vape ritual as satisfying as the final hit. You are not just assembling wire; you are building a heating element. That stays balanced, secure, and properly wicked to deliver the performance you want.
Following a clear order helps you avoid small mistakes that can cause short circuits or a burnt taste later. Here is how to turn a spool of wire into a high-performance build on your own deck:
- Preparing and Wrapping the Wire: Start by snipping off a length of wire—usually about five or six inches is plenty to give you enough “tail” to work with. Hold one end firmly against the handle of your coil jig or the shaft of a screwdriver, and begin wrapping the wire around the rod. You want to keep the tension consistent and ensure the loops are sitting tight against each other without overlapping. For a standard beginner build, aiming for six or seven wraps is the “sweet spot” for a reliable resistance. Once you’re done, you should have a clean, spring-like coil with two straight legs pointing in the same direction.
- Mounting the Coil to the Deck: Loosen the screws on your atomizer’s posts until you can slide the wire legs into place. Guide one leg into the positive post and the other into the negative post. Use your jig to center the coil over the airflow holes. Position the coil close to the airflow, but avoid touching the deck or posts. Tighten the screws firmly, but do not over-tighten and snap the wire. This ensures a solid electrical connection. After securing the coil, use flush cutters to trim the excess wire tails as close to the posts as possible. Make sure the trimmed ends do not touch the outer housing.
- Checking Resistance and Dry Firing: Before you even think about adding cotton, you need to verify the build is safe. Pop the atomizer onto your ohm reader or a regulated mod and check the resistance; it should be stable and close to your target number. If the reading is jumping around, double-check that your post screws are tight. Once it’s stable, fire the device at a low wattage (around 15-20 watts) for short pulses. You are looking for the coil to glow an even, dull orange starting from the center and moving outward. If you see any bright “hot spots” or uneven glowing, use your ceramic tweezers to gently strum or “rake” across the surface of the wraps until the glow is perfectly uniform.
- Threading the Wicking Material: Wait a minute for the metal to cool down completely—touching hot wire is a mistake you’ll only make once. Take a strip of organic cotton and roll one end into a tight point, then thread it through the center of your coil. The fit should be snug; you want to feel a little bit of resistance as you pull it through, but it shouldn’t be so tight that it deforms the shape of your wire wraps. If it’s too loose, the juice won’t vaporize correctly; if it’s too tight, the liquid won’t be able to reach the center of the coil, leading to an immediate dry hit.
- Trimming and Positioning the Cotton: Use your scissors to trim the ends of the cotton so that they are just long enough to tuck into the juice wells at the bottom of the deck. You don’t want to pack the cotton in tightly; it needs to be “fluffy” to allow for better capillary action. Use your tweezers to gently tuck the ends down, making sure there’s still a clear path for air to travel under and around the coil. If the deck is overcrowded with cotton, the airflow will be restricted and the flavor will suffer.
- Priming and Final Testing: This is the most important step for preserving your fresh build. Drip your e-juice directly onto the coil and cotton until every fiber looks fully wet. Apply enough liquid to soak the cotton core inside the coil completely. Then, test fire the device briefly to check if it produces vapor correctly. Put the top cap back on, wait about thirty seconds for the liquid to fully settle, and you are ready to experience a vape that you built entirely with your own hands. At this stage in the coil building guide, checking resistance is critical to avoid performance issues.
Once you’ve mastered the simple round-wire build, a whole new world of “exotic” coils opens up. These builds don’t just look impressive; they increase the metal’s surface area, which improves flavor and boosts vapor production:
- Clapton Coils: Named after the guitar string they resemble, a Clapton consists of a thin wire wrapped tightly around a thicker core wire. The tiny grooves between the wraps trap juice, leading to an incredibly dense and flavorful hit.
- Fused Claptons: These are similar to standard Claptons but feature two or more core wires. This further increases the surface area and allows for even more intricate flavor profiles to shine through.
- Alien Coils: An Alien is a de-cored Clapton wrap that has been stretched out and re-wrapped over a multi-strand core. The distinct wavy texture is legendary for its ability to produce top-tier flavor and clouds.
- Parallel Builds: This involves wrapping two strands of wire side-by-side at the same time. It doubles the surface area and cuts the resistance in half, making it a great way to get a high-performance hit out of simple round wire.
- Twisted Coils: By twisting two or more strands of wire together before wrapping them, you create a rope-like texture. This creates more nooks and crannies for the juice to sit in, which significantly boosts the flavor compared to a single strand. As you progress through this coil building guide, experimenting with advanced coil types becomes the next step.
Now You’re on Your Way to Coil Building Success!
By following this coil building guide, you gain full control over your vaping experience, from flavor to performance. Taking the time to build your own coils ensures each hit matches your preference for heat, density, and flavor. By understanding how the wire and wick work, you avoid issues caused by inconsistent hardware and poor taste. Relying on your own skills also builds confidence and creates a stronger connection to the process. A simple pod system cannot replicate this experience. Mastering this craft requires a small effort. However, it delivers a more satisfying and reliable experience every time you use your device. And for all your DIY supplies, head on over to Vapor Tek USA today.